
How to Create a Social Media Content Calendar: Step-by-Step Guide
Creating a social media content calendar helps organize posts, maintain consistency, and boost engagement across platforms with a clear, step-by-step plan.

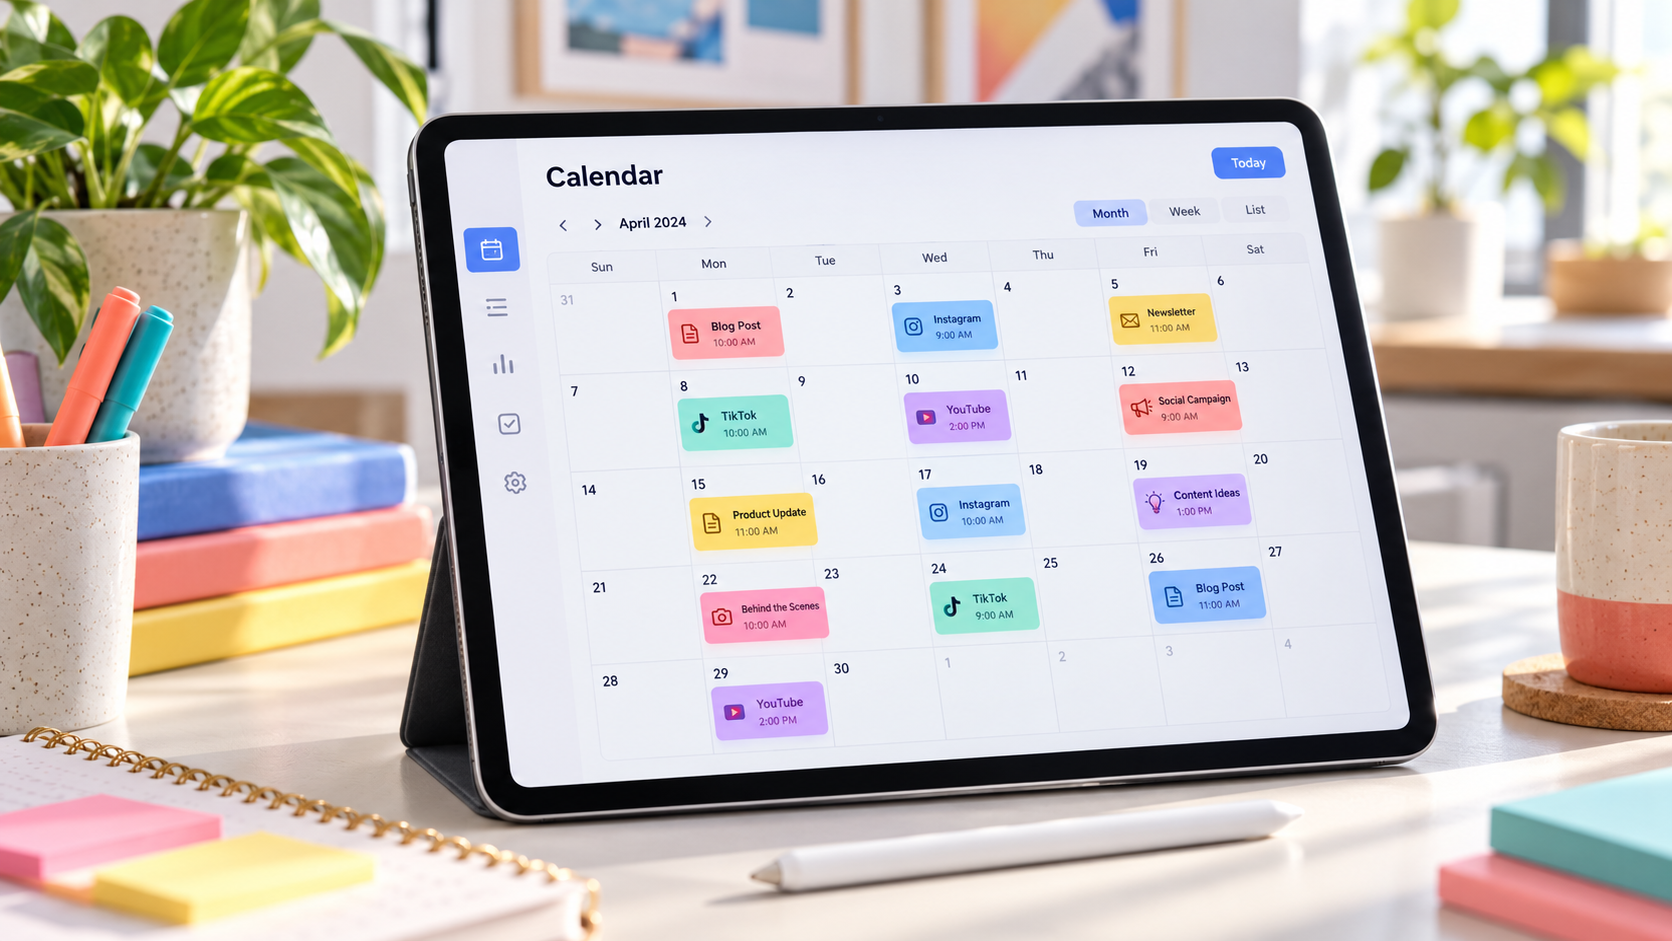
A social media content calendar is a practical schedule that shows what you will publish, where you will publish it, and when each post will go live. Creating a social media content calendar helps you replace last-minute posting with a repeatable system for producing, approving, scheduling, and measuring content. The process starts with clear goals and an audit of your current channels, then moves through content themes, publishing frequency, production workflows, and performance reviews.
Whether you manage one brand account or coordinate campaigns across several platforms, a calendar gives your strategy a visible structure. It helps you maintain consistency without posting for the sake of activity, balance promotional and educational messages, prepare assets in advance, and make better use of high-performing ideas. This guide explains how to plan social media content step by step, with a system that is detailed enough for a marketing team but simple enough for an individual creator.
Why You Need a Social Media Content Calendar | Step 1: Define Goals, Audiences, and Priority Platforms | Step 2: Audit Existing Content and Identify Opportunities | Step 3: Build Content Pillars and Choose a Sustainable Mix | Step 4: Design Your Calendar and Select the Right Fields | Step 5: Choose a Realistic Publishing Schedule | Step 6: Create a Production and Approval Workflow | Step 7: Schedule, Publish, and Manage Engagement | Step 8: Measure Results and Improve the Next Calendar | Frequently Asked Questions
Why You Need a Social Media Content Calendar
Social media often feels immediate, but effective accounts rarely depend entirely on spontaneous ideas. Behind a consistent feed is usually a planning process that connects business goals, audience needs, creative production, and publishing deadlines. A calendar brings those elements together in one place.
The first benefit is consistency. Your audience is more likely to remember and trust your brand when useful content appears regularly. A calendar makes gaps visible before they happen, allowing you to prepare posts instead of rushing to fill an empty slot. It also prevents the opposite problem: publishing several similar posts at once because different team members are working without a shared schedule.
A calendar improves strategic balance as well. Looking at a week or month at a glance reveals whether your plan contains too many sales messages, too few videos, or repeated topics. You can deliberately mix educational posts, customer stories, product demonstrations, community conversations, and promotional campaigns rather than relying on whichever idea is easiest to produce that day.
Social media post planning also protects production time. When topics and formats are decided early, writers can draft captions in batches, designers can create several assets in one session, and managers can review posts before deadlines become urgent. This reduces context switching and creates space for stronger creative work.
Finally, a calendar does not eliminate flexibility. It creates a reliable baseline so you can respond to trends, news, customer feedback, or unexpected opportunities without abandoning your core strategy. A well-planned schedule should reserve room for timely posts while ensuring important campaigns still receive the attention they need.
Step 1: Define Goals, Audiences, and Priority Platforms
Before adding dates to a spreadsheet, decide what your social media activity is expected to accomplish. A calendar built without goals may look organized while producing little business value. Choose one or two primary objectives for each channel, such as increasing brand awareness, generating qualified leads, building a community, driving website traffic, supporting customers, or increasing sales.
Turn broad objectives into measurable targets. Instead of “grow engagement,” set a goal such as increasing meaningful comments and shares by 15 percent during the next quarter. Instead of “get more traffic,” define the number of landing-page visits or email sign-ups you want social content to generate. These targets will influence the topics, formats, calls to action, and metrics included in your plan.
Next, describe the audience you want to reach. Go beyond age and location. Document their main problems, desired outcomes, level of expertise, common objections, preferred content formats, and reasons for following an account like yours. A marketing agency, for example, might speak differently to a first-time small-business owner than to an experienced in-house marketing director.
Then evaluate which platforms deserve priority. You do not need to publish everywhere. Focus on channels where your audience is active and where your team can produce content that fits the platform. LinkedIn may support professional insights and lead generation, Instagram may suit visual storytelling and short video, while TikTok may be useful for accessible demonstrations, personality-led education, and cultural participation.
Give every priority platform a clear role. One channel might attract new audiences, another might deepen trust, and another might drive conversions. This prevents blind cross-posting and helps you adapt the same core idea to different user expectations.
Step 2: Audit Existing Content and Identify Opportunities
A content audit shows what has already worked, what should be improved, and what no longer supports your strategy. Review at least the previous three months of posts; use six to twelve months if your business has strong seasonal patterns or longer campaign cycles.
Record the platform, publication date, topic, content format, objective, reach, impressions, engagement, clicks, conversions, and production effort for each relevant post. The exact metrics will vary by goal. Awareness content should be judged using reach, impressions, video views, and audience growth. Consideration content may be better assessed through saves, shares, profile visits, and website clicks. Conversion content should be connected to leads, registrations, purchases, or another meaningful action.
Look for patterns rather than isolated winners. One post may perform unusually well because a large account shared it. A repeatable pattern is more useful: perhaps concise tutorials consistently earn saves, founder stories prompt comments, or customer examples produce qualified clicks. Note which hooks, topics, formats, lengths, and publishing times appear repeatedly among stronger posts.
Also identify content gaps. Are you answering beginner questions but ignoring advanced customers? Are you promoting a product without showing how it solves a real problem? Are you publishing attractive images without giving followers a reason to save or share them? Gaps are often more valuable than a list of random new ideas because they connect directly to unmet audience needs.
Finish the audit by sorting existing material into four categories: reuse, refresh, repurpose, or retire. A successful article can become a carousel, short video, email tip, and discussion prompt. An outdated tutorial may need updated examples. A weak idea can be retired instead of occupying another calendar slot. This process makes creating a social media content calendar faster because you are building from evidence rather than starting with an empty page.
Step 3: Build Content Pillars and Choose a Sustainable Mix
Content pillars are the recurring subject areas that connect your expertise with audience interests and business goals. Most brands need between three and six pillars. Fewer may become repetitive; too many can weaken your identity and increase production complexity.
A software company might use education, product workflows, customer results, industry analysis, and company culture as its pillars. A fitness creator might choose training technique, recovery, nutrition, mindset, and personal progress. Each pillar should be broad enough to support many posts but specific enough to make idea generation easier.
For each pillar, list common questions, mistakes, aspirations, myths, and decision points. Turn these into repeatable series such as “Monday Myth,” “One-Minute Tutorial,” “Customer Workflow,” or “Behind the Campaign.” Recurring series reduce creative pressure because the structure stays familiar while the subject changes.
Assign a purpose to every planned post. Useful categories include educate, inspire, entertain, engage, prove, and promote. There is no universal content ratio, but a beginner-friendly starting point is to make most posts useful or engaging and reserve a smaller portion for direct promotion. Adjust the mix based on your sales cycle and audience expectations. A retail brand during a launch week may naturally publish more promotional content than a consultant building long-term authority.
Balance formats as deliberately as topics. Your calendar might include short videos for discovery, carousels for step-by-step education, static graphics for concise messages, polls for interaction, and customer stories for social proof. Choose formats your team can sustain. Publishing two strong videos each week is more valuable than planning daily videos that cannot be produced consistently.
Finally, create an idea bank organized by pillar, funnel stage, and format. Capture customer questions, sales objections, search queries, support conversations, competitor gaps, industry developments, and comments from previous posts. A structured idea bank turns the question “What should we post?” into the simpler task of selecting the right idea for an available calendar slot.


Step 4: Design Your Calendar and Select the Right Fields
A simple social media calendar can live in a spreadsheet, project-management board, database, or dedicated publishing platform. The best tool is the one your team will update consistently. Start with a lightweight structure and add complexity only when it solves a real coordination problem.
At minimum, every calendar entry should include the publication date, time, platform, content pillar, format, working topic, caption, call to action, asset link, owner, and status. Campaign name, target audience, destination URL, tracking parameters, approval deadline, and performance results may also be useful for larger teams.
Use clear workflow statuses such as idea, briefed, in production, awaiting review, approved, scheduled, published, and needs analysis. Status labels make bottlenecks visible. If many posts remain “awaiting review,” the problem may not be idea generation; it may be an approval process that needs clearer deadlines or fewer decision-makers.
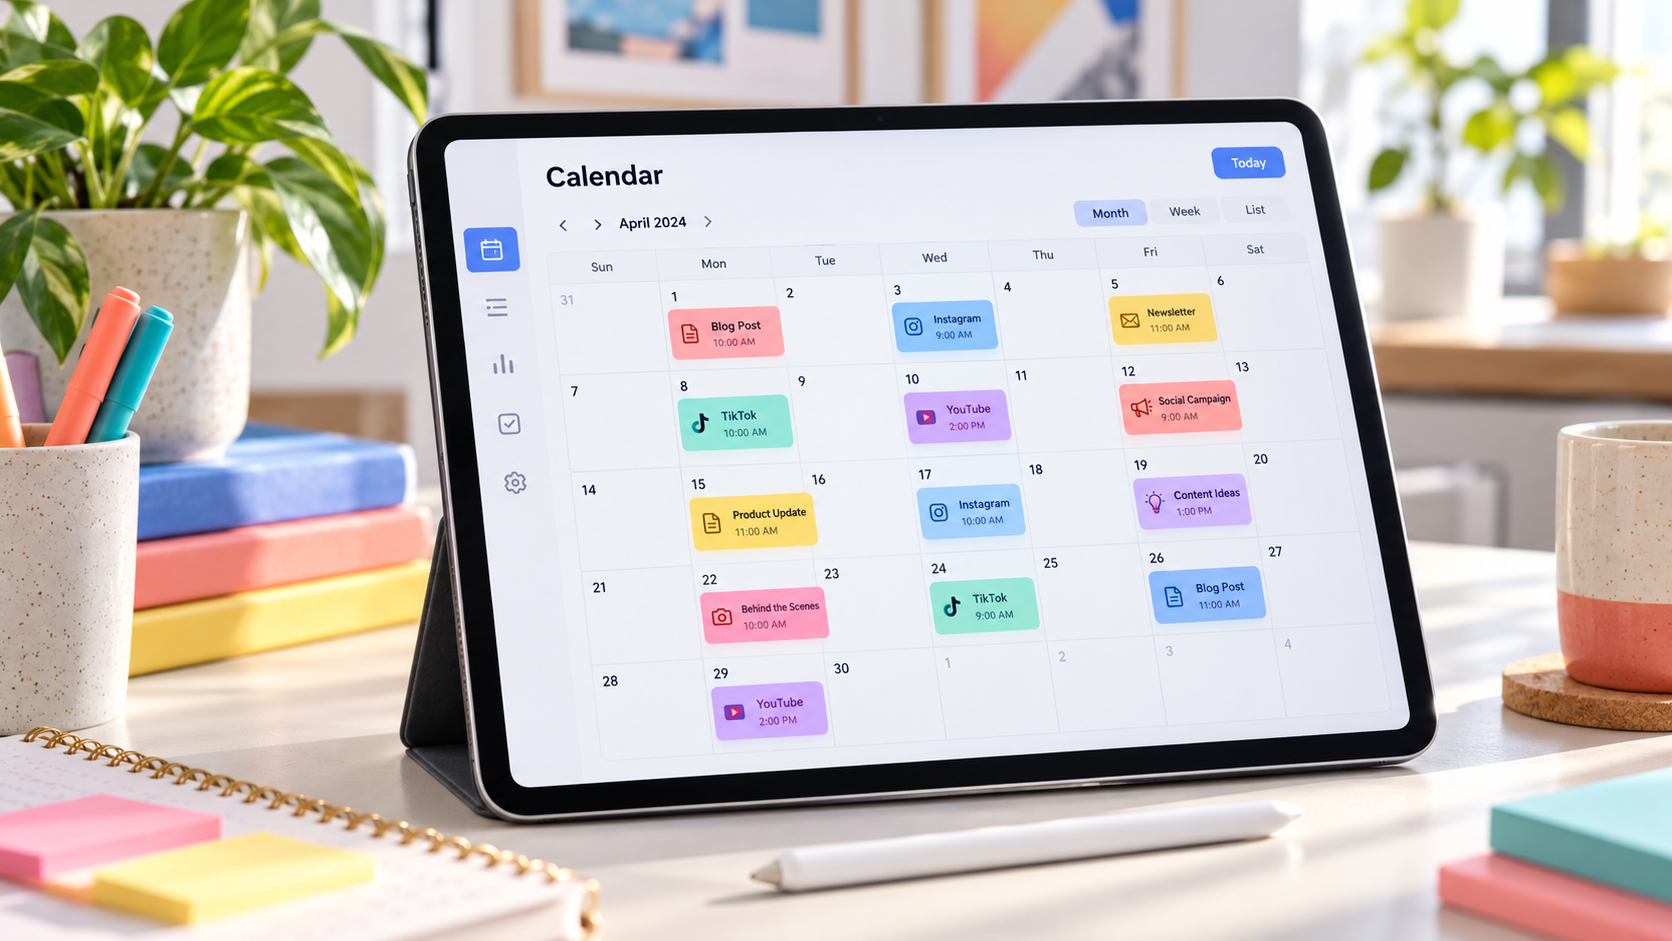
Include separate views for different needs. A monthly view is helpful for campaign balance, seasonal events, launches, and major deadlines. A weekly social media planner gives creators a closer view of immediate production and publishing tasks. A list or board view can help managers track ownership and status.
Color coding can improve readability when used with restraint. Assign colors to platforms, campaigns, or content pillars, but do not use all three systems simultaneously unless your tool supports filtering. The purpose is to understand the plan quickly, not to create a complicated visual key.
Build a reusable template instead of creating a new calendar each month. Include recurring meetings, reporting dates, evergreen series, production deadlines, and approval checkpoints. A consistent template shortens setup time and makes it easier to onboard collaborators.
Step 5: Choose a Realistic Publishing Schedule
One of the most important social media calendar tips is to plan according to your capacity, not an arbitrary ideal frequency. A demanding schedule can quickly reduce quality and exhaust a small team. Start with the number of posts you can research, create, review, and respond to consistently.
Work backward from available resources. Estimate how long each format takes from concept to publication. A simple text post might require 30 minutes, while a scripted video could require several hours of writing, filming, editing, captioning, and approval. Multiply those estimates by the proposed frequency and compare the result with the team’s actual production time.
Then choose publishing days and times using platform analytics, audience behavior, campaign priorities, and operational needs. Timing matters, but it rarely compensates for weak content. Treat recommended posting times as starting points and test them against your own results.
A practical weekly plan might include an educational carousel on Monday, a short demonstration video on Wednesday, a customer story on Thursday, and an interactive question on Friday. Stories, community replies, and timely posts can support the core schedule without requiring a full feed post every day.
Plan one to four weeks ahead depending on your business. Evergreen educational content can be prepared further in advance, while trend-driven or news-based content needs shorter lead times. Leave one or two flexible slots each week if rapid response is important to your brand.

Step 6: Create a Production and Approval Workflow
A calendar becomes useful only when it is connected to a reliable production process. Define who is responsible for research, copywriting, design, filming, editing, fact-checking, approval, scheduling, and community management. Even a one-person business benefits from treating these as distinct stages.
Batch similar tasks whenever possible. Research several topics in one session, draft multiple captions together, or film a group of videos using the same setup. Batching reduces setup time and helps maintain a consistent visual and editorial style. It also creates a buffer for busy weeks.
Set internal deadlines before publication dates. A post scheduled for Friday might need a finished draft by Tuesday, review on Wednesday, and final scheduling on Thursday. This buffer gives the team time to correct errors, replace missing assets, and resolve feedback without delaying the campaign.
Create a concise content brief for complex posts. Include the audience, objective, key message, supporting evidence, format, desired action, brand requirements, and examples. A clear brief reduces vague feedback and keeps creators focused on the intended outcome.
Limit approval rounds and name the final decision-maker. Feedback should be specific, consolidated, and connected to the objective. Comments such as “make it pop” create more work without providing direction; comments such as “move the result into the first sentence to strengthen the hook” are actionable.
Before scheduling, use a quality-control checklist. Confirm that links work, names and statistics are accurate, visuals fit platform dimensions, captions are proofread, accessibility text is included where appropriate, and calls to action match the destination. Check that scheduled posts do not conflict with other announcements or sensitive events.
Step 7: Schedule, Publish, and Manage Engagement
Once posts are approved, schedule them through a suitable publishing tool. Scheduling reduces manual work and lowers the risk of missed deadlines, especially when several channels are involved. Keep final captions, assets, links, and publishing settings together so the scheduled version matches the approved version.
Automation should support human participation, not replace it. Assign someone to monitor comments, direct messages, mentions, and technical issues after publication. Fast, thoughtful responses can turn an ordinary post into a meaningful conversation and provide ideas for future content.
Create response guidelines for common questions, complaints, sales inquiries, and sensitive topics. These guidelines help community managers respond consistently while making it clear when an issue should be escalated. Avoid making every response sound scripted; use the guidelines as boundaries rather than fixed dialogue.
Check posts shortly after they go live. Verify formatting, link behavior, image crops, subtitles, and tags. Platform previews are useful, but errors can still appear in the published version. Early checks make corrections easier.
Keep room for real-time content, but apply the same strategic filter used for planned posts. Ask whether a trend is relevant to your audience, appropriate for your brand, and achievable while it is still timely. Participation is not automatically valuable simply because a topic is popular.
Step 8: Measure Results and Improve the Next Calendar
A content calendar should become smarter over time. Add a recurring review at the end of each week or month to compare results with your original goals. Review performance by content pillar, platform, format, campaign, and call to action rather than looking only at total engagement.
Choose metrics that match the job of each post. Reach and video completion can indicate whether awareness content held attention. Saves and shares can reveal practical value. Click-through rate can measure interest in a resource or offer. Leads and revenue are important for conversion campaigns, but they should not be used to judge every community-building post.
Document qualitative insights as well. Comments may reveal objections, language customers use, requests for deeper explanations, or confusion about an offer. Sales and support teams can add context that platform dashboards cannot provide.
During each review, decide what to continue, stop, and test. Continue formats and themes that repeatedly support your goals. Stop activities that consume resources without producing useful signals. Test one meaningful variable at a time, such as the opening hook, video length, creative style, call to action, or publishing time.
Do not rebuild the entire calendar after one weak week. Social performance can fluctuate because of seasonality, distribution changes, competing events, or a small sample size. Look for patterns across several posts, then use those patterns to shape the next planning cycle.
The strongest calendar is not necessarily the most detailed. It is the one that helps your team make decisions, produce quality work on time, and learn from results. Begin with a manageable structure, review it regularly, and expand it only when additional detail improves execution.
Frequently Asked Questions
How far in advance should I plan social media content?
Most teams benefit from planning core content two to four weeks in advance. Evergreen campaigns can be planned earlier, while news, trends, and community responses should remain flexible. Use a monthly view for strategy and a weekly social media planner for production details, last-minute adjustments, and daily ownership.
What should a social media content calendar include?
At minimum, include the publication date and time, platform, topic, content pillar, format, caption, call to action, asset link, owner, and production status. Add campaign names, approval deadlines, tracking links, target audiences, and results when they support your workflow. A simple social media calendar should make responsibilities and deadlines clear without burying the team in unnecessary fields.
How often should a business post on social media?
There is no single frequency that works for every business or platform. Start with a schedule your team can maintain while producing relevant content and managing audience responses. Monitor results and gradually adjust the frequency. Consistent, valuable posts usually outperform a high-volume schedule that leads to repetitive ideas or weak production.
Can I use the same content on multiple social platforms?
Yes, but adapt it to each platform’s format, audience behavior, and communication style. One core idea might become a LinkedIn text post, an Instagram carousel, and a short vertical video. Repurposing saves time, while platform-specific hooks, captions, dimensions, and calls to action help the content feel native rather than copied.