
How to Pre-Schedule Social Media Posts Effectively
Effective pre-scheduling of social media posts saves time and boosts engagement by ensuring consistent content delivery across platforms.

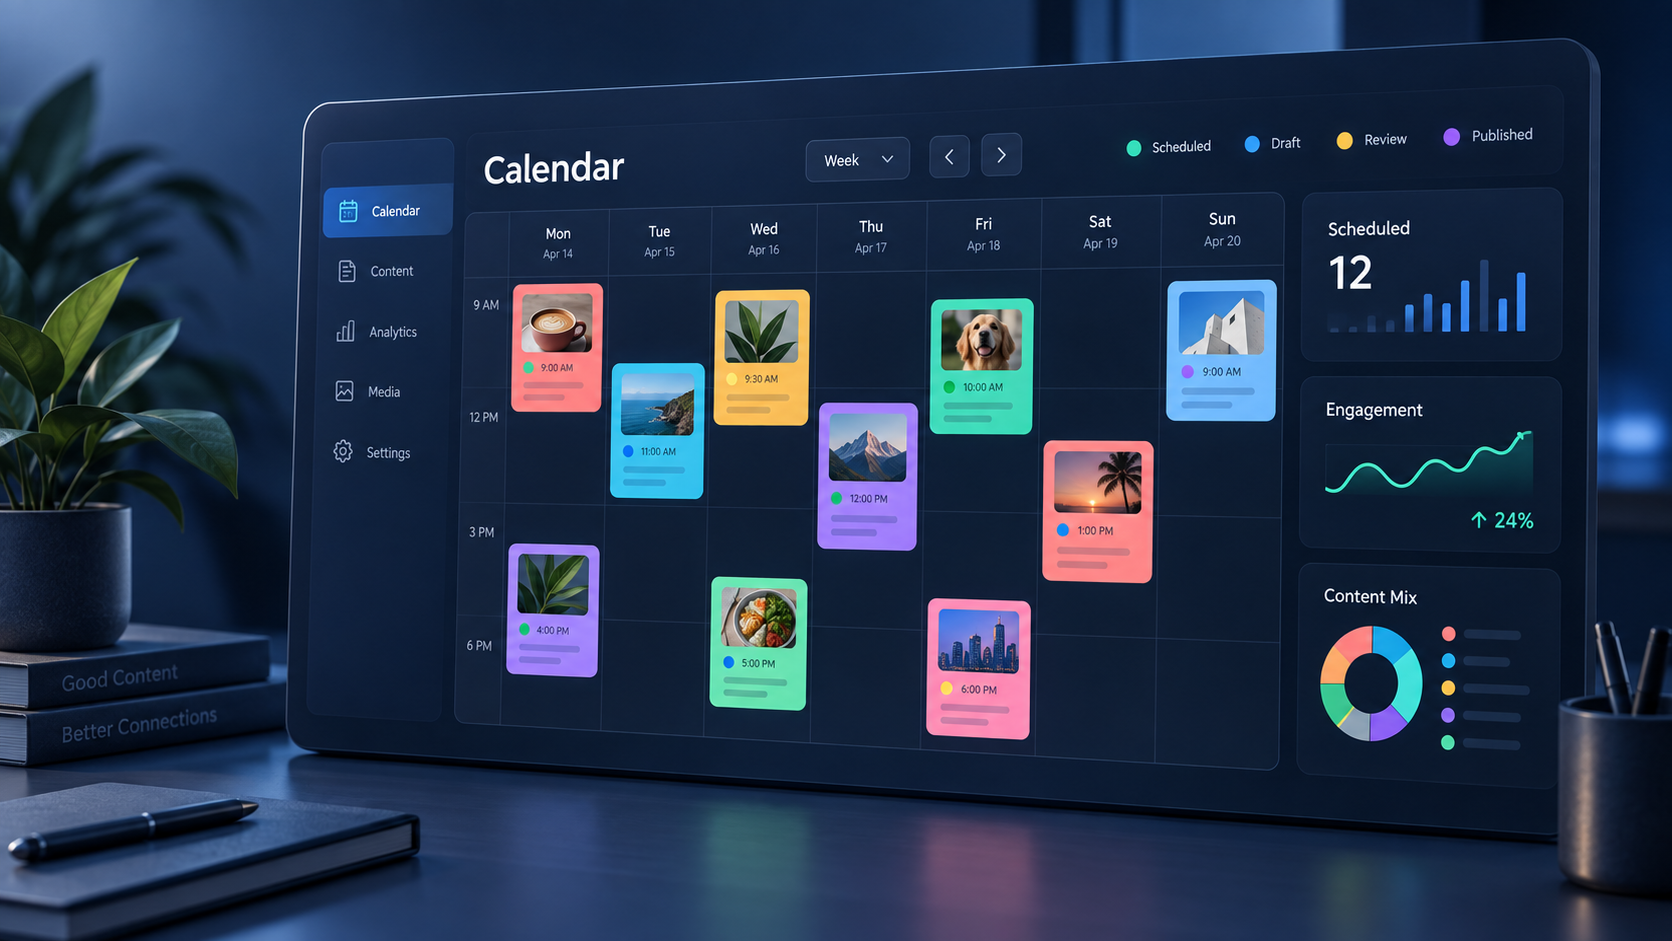
To pre-schedule social media posts effectively, create a structured content calendar, prepare platform-specific content in batches, choose a reliable scheduling tool, set publishing times based on audience behavior, and monitor posts after they go live. Scheduling is not simply a way to automate publishing; it is a system for maintaining consistency, improving content quality, and giving your team more time to engage with followers. The following step-by-step process will help you build a practical workflow that supports both efficiency and meaningful audience growth.
Start With Clear Goals and a Practical Content Calendar | Create and Prepare Content in Efficient Batches | Choose the Right Social Media Scheduling Tool | Schedule Every Post With a Reliable Step-by-Step Process | Optimize Posting Times Without Relying on Generic Rules | Protect Engagement While Automating Publication | Measure Performance and Improve Your Scheduling System | Common Scheduling Mistakes to Avoid | Frequently Asked Questions
Start With Clear Goals and a Practical Content Calendar
Before opening a scheduling app, decide what your social media content needs to accomplish. Your goals might include generating leads, increasing brand awareness, driving traffic, building a community, or encouraging product purchases. Each goal requires a different mix of formats, messages, and calls to action. A lead-generation plan, for example, may prioritize educational posts and downloadable resources, while a community-building plan may feature questions, polls, customer stories, and behind-the-scenes content.
Translate those goals into several repeatable content pillars. Most brands work well with three to five pillars, such as education, product value, social proof, industry insight, and brand personality. These categories make planning easier because you are not starting with a blank calendar every week. They also prevent your feed from becoming overly promotional or repetitive.
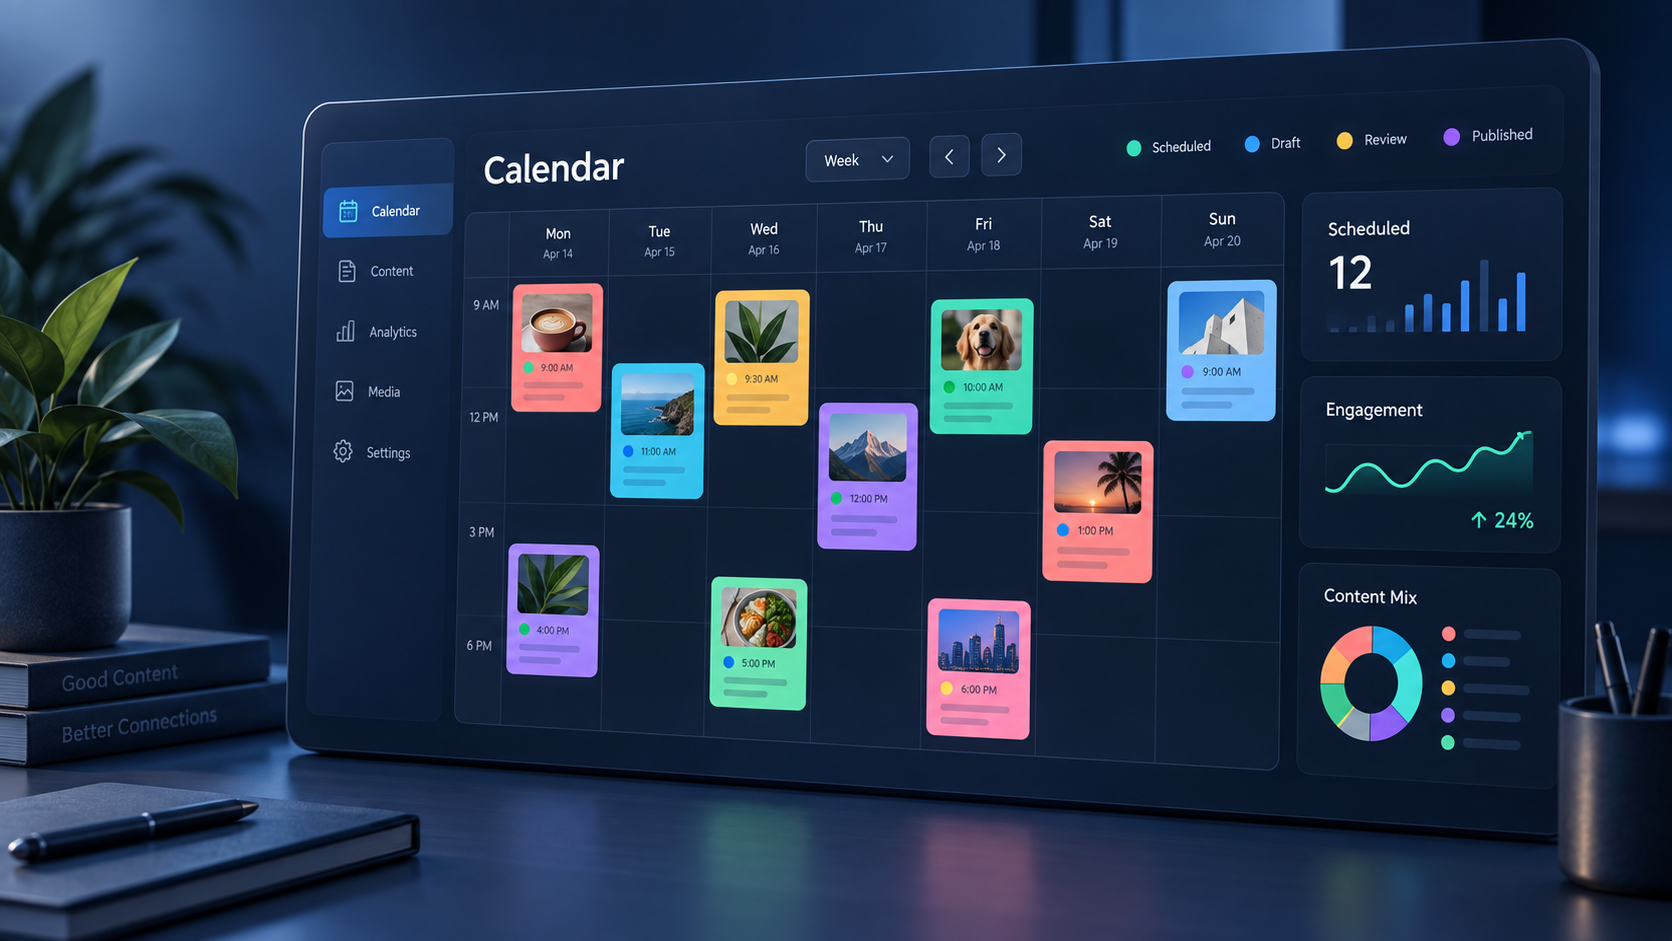
Next, build a calendar that shows the publishing date, platform, content pillar, format, topic, caption, creative asset, call to action, campaign, and approval status for every post. A spreadsheet can work for a small operation, although a dedicated calendar becomes useful when multiple people create, review, or publish content.
Plan at an appropriate distance. A two- to four-week schedule is usually flexible enough for active social channels, while evergreen campaigns may be prepared several months ahead. Avoid filling every available slot. Reserve space for trends, customer responses, company announcements, and timely industry conversations. Effective planning provides direction without making the brand sound disconnected from current events.
Create and Prepare Content in Efficient Batches
Content batching is one of the most useful post scheduling techniques because it reduces context switching. Instead of writing one caption, editing one image, and scheduling one post at a time, group similar tasks together. Research several topics in one session, write multiple captions in another, and produce visual assets during a dedicated design or filming block.
Begin each batch with a brief that defines the audience, content pillar, main message, desired action, platform, and format. The brief does not need to be long. Its purpose is to keep every asset focused. A post designed to earn saves should offer a useful checklist, framework, or reference. A post designed to start conversations should present a clear point of view and ask a question people can answer without extensive effort.
Create a master version of each idea, then adapt it for individual networks. Do not copy the exact same caption everywhere. LinkedIn may benefit from a detailed professional explanation, Instagram may need a strong opening line and visually organized carousel, TikTok may require a concise video hook, and X may call for a compressed insight or short thread. Adapt dimensions, video duration, link placement, hashtags, tagging conventions, and tone to the platform.
Prepare all publishing elements before scheduling. Confirm that videos have captions, images include alternative text where supported, links use the correct landing page, and campaign tracking parameters are consistent. Check cover images and thumbnail crops on both desktop and mobile previews. A compelling video can still underperform if its cover hides the subject or cuts off the headline.
Use a naming convention for assets, such as campaign-platform-date-format-version. Clear file names reduce mistakes when several similar graphics are waiting for approval. Store final assets in one shared location and distinguish them from drafts so that an outdated design is never scheduled accidentally.

Choose the Right Social Media Scheduling Tool
The best tool is the one that supports your actual publishing workflow. Native tools can be sufficient for individuals managing one or two networks. Meta Business Suite, for example, can support Facebook and Instagram planning, while other platforms offer their own publishing or studio features. Native options may also provide early access to platform-specific functions.
A third-party scheduler is often more efficient when you manage several brands, accounts, or networks. Useful capabilities include a visual calendar, multi-platform publishing, drafts, approval workflows, first-comment scheduling, media libraries, link tracking, analytics, role-based access, and notifications for formats that require manual completion.
Before committing to an app, verify whether it can publish every format you use. Some platforms restrict automatic publishing for particular post types, music selections, stickers, collaboration features, or interactive elements. In those cases, the scheduler may send a reminder rather than publish automatically. This is still helpful, but the distinction should be documented in your workflow.
Evaluate tools using a short real-world trial. Schedule a week of representative content, including images, carousels, short videos, links, and first comments. Test previews, account selection, time-zone handling, approval notifications, failed-post alerts, and reporting. Invite everyone who will use the system so you can identify permission or usability problems before adopting it.
Security also matters. Grant each team member an individual login when possible instead of sharing passwords. Use the minimum permissions required, enable multi-factor authentication, and remove access promptly when a contractor or employee leaves. Review connected accounts periodically because expired permissions can cause scheduled posts to fail without much warning.
Schedule Every Post With a Reliable Step-by-Step Process
Once the plan, assets, and tool are ready, use the same scheduling sequence for every post. A repeatable process improves speed and makes errors easier to catch.
- Select the correct account and platform. Confirm the profile before adding content, especially if you manage brands with similar names or regional accounts.
- Upload the final creative asset. Check image order, aspect ratio, video quality, thumbnail selection, subtitles, and platform-specific safe zones.
- Add the adapted caption. Review the opening line, readability, brand voice, spelling, mentions, hashtags, and call to action.
- Insert links and tracking. Use the intended landing page and apply consistent UTM parameters when you need campaign-level analytics.
- Add accessibility details. Include alternative text, descriptive captions, and burned-in or platform-native subtitles where appropriate.
- Set the publication date and time. Confirm the scheduler’s time zone and account for daylight-saving changes or regional audiences.
- Assign approval if required. Route regulated, sensitive, sponsored, or high-visibility content to the appropriate reviewer.
- Preview the post. Inspect both mobile and desktop representations when available, paying close attention to line breaks and cropping.
- Schedule and verify. Make sure the post appears in the calendar with the correct status, platform, and publishing time.
Create a final quality-control checklist inside your project management or scheduling system. Include recurring risks such as incorrect dates, missing disclosure labels, outdated discount codes, broken links, unapproved claims, and accidental cross-posting. For important campaigns, have a second person complete the review.
Be particularly careful with time-sensitive wording. Phrases such as “today,” “tomorrow,” or “this weekend” can become incorrect if a post is moved. Use exact dates when clarity matters, and review scheduled posts immediately if a launch date, inventory situation, public event, or offer changes.
Optimize Posting Times Without Relying on Generic Rules
Lists of universal “best times to post” can provide a starting point, but your audience data is more valuable. The right time depends on location, daily routines, platform habits, content format, and the action you want people to take. A business audience may engage during weekday working hours, while entertainment content may perform better during evenings or weekends.
Start with native platform analytics or reports from your scheduler. Look for the days and hours when followers are online, then compare that information with actual post performance. Audience availability does not always equal audience attention. People may open an app during a busy commute but engage more deeply later in the evening.
Run controlled tests for at least four to six weeks. Choose several time windows and distribute comparable posts across them. Evaluate reach, watch time, saves, comments, clicks, conversions, and engagement rate rather than focusing only on likes. Use the metric that reflects the post’s objective. A post published to drive website traffic should be judged primarily by qualified clicks and subsequent actions.
One of the most practical social media scheduling tips is to publish when someone can respond. Early engagement may help a post develop momentum, and quick replies make the audience feel acknowledged. If your highest-performing time occurs outside normal working hours, assign coverage, use a rotating community-management schedule, or test a nearby time that your team can support.
For international audiences, segment schedules by region when the platform and account structure allow it. If a single account serves several time zones, rotate publication times so one group is not consistently favored. Evergreen posts can also be republished later with a different creative angle, provided the repetition is spaced appropriately and still delivers value.

Protect Engagement While Automating Publication
Scheduling should automate distribution, not relationships. A fully scheduled feed can still feel human when the content reflects real audience questions and the team participates after publication. Set aside time each day to answer comments, respond to direct messages, acknowledge mentions, and join relevant conversations.
Prepare engagement prompts alongside each scheduled post. Note likely questions, useful resources, product details, and escalation contacts. This is especially helpful when a community manager did not create the original content. For launches or potentially sensitive topics, draft response guidelines in advance without making replies sound scripted.
Avoid scheduling posts and forgetting them. Review the queue at least once a week and whenever significant news affects your industry or audience. Pause content that could appear insensitive, irrelevant, or confusing during an emergency, major public event, or sudden organizational change. Most scheduling tools make it possible to stop an entire queue temporarily.
Balance evergreen material with timely participation. Educational guides, customer tips, FAQs, and brand stories can be prepared in advance. Trend-based posts, reactions, and event coverage often need faster production and human judgment. A practical calendar might reserve 70 to 80 percent of slots for planned content and leave the remainder flexible, although the ideal ratio varies by brand.
Also watch for automation patterns that make a feed predictable. Publishing the same format at the same time every day may simplify operations but eventually reduce audience interest. Rotate formats, creative styles, topics, opening hooks, and calls to action. Consistency should make your brand dependable, not monotonous.
Measure Performance and Improve Your Scheduling System
A scheduling workflow becomes valuable when it produces measurable learning. Create a simple report that connects each post to its content pillar, format, publication time, objective, and results. Review performance weekly for operational issues and monthly for broader patterns.
Track metrics that match your funnel. Reach and video views show distribution, while saves and shares often indicate lasting content value. Comments can reveal relevance or controversy, but their quality matters more than raw volume. Link clicks, leads, sales, and conversion rate show whether content contributes to business outcomes.
Compare posts within similar categories. A short video and a static product announcement may have different performance baselines, so comparing them directly can lead to poor decisions. Instead, evaluate educational videos against other educational videos or compare carousel posts published for similar objectives.
Document what you learn. You may discover that customer stories perform well on weekday mornings, tutorials generate more saves in the evening, or promotional posts need stronger proof before audiences click. Turn each insight into a testable change for the next calendar rather than treating it as a permanent rule based on one result.
Audit the broader process each quarter. Identify approval bottlenecks, recurring publication failures, channels that consume time without supporting goals, and content types that are difficult to produce consistently. Update templates, permissions, posting frequency, and team responsibilities accordingly. The best system for pre schedule social media posts is one that grows simpler and more precise as your evidence improves.
Common Scheduling Mistakes to Avoid
Scheduling too far ahead is a frequent mistake. It can lock the team into old assumptions and reduce its ability to respond to new information. Maintain a reliable pipeline, but schedule sensitive or rapidly changing content closer to its publication date.
Another mistake is using identical content across every platform. Cross-posting saves time, but it can ignore differences in audience expectations and native formats. Preserve the core idea while adapting the presentation, caption length, creative dimensions, and call to action.
Do not overload the calendar simply because automation makes publishing easy. More posts do not automatically produce more results. Excessive frequency can lower average quality, divide engagement, and exhaust the production team. Choose a cadence your organization can maintain while still responding to the audience.
Finally, do not treat scheduled status as proof that a post will publish successfully. Account permissions expire, files fail to process, and platform connections break. Enable failure notifications, check the live profile after important posts, and keep original captions and assets organized so failed content can be published manually if necessary.
Frequently Asked Questions
How far in advance should social media posts be scheduled?
Most brands benefit from scheduling routine content two to four weeks ahead. Evergreen campaigns can be prepared further in advance, while trend-driven, sensitive, or time-dependent posts should remain flexible. Review the queue weekly to confirm that every post is still accurate and appropriate.
What is the best tool for pre-scheduling social media posts?
The best tool depends on your channels, team size, budget, and approval needs. Native platform tools may suit an individual creator, while agencies and multi-brand teams often need a unified calendar, permissions, approval routing, analytics, asset storage, and failed-post alerts. Test tools with your actual formats before choosing one.
Does scheduling posts reduce engagement?
Scheduling itself does not inherently reduce engagement. Performance is more likely to depend on content relevance, creative quality, timing, and active community management. Scheduled posts can perform strongly when the team is available to answer comments and when content has been adapted to each platform.
How often should scheduled content be reviewed?
Check publishing notifications and live posts daily, review the upcoming queue weekly, and analyze overall performance monthly. Conduct a deeper workflow audit every quarter. Review everything immediately when a campaign changes or an external event could make scheduled content inaccurate, inappropriate, or poorly timed.